
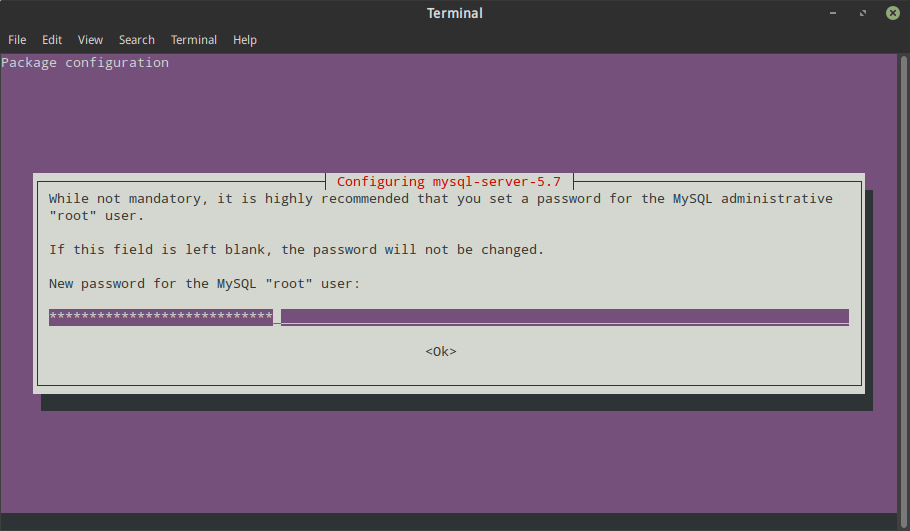
在 Ubuntu 18.04 之前的版本,直接透過 apt 安裝 Ubuntu 套件庫中的 MySQL 資料庫 (sudo apt install mysql-server) 過程中會有設定 root 密碼的提示畫面:
但從 Ubuntu 18.04 開始,安裝預設套件庫提供的 MySQL 就已經不會在安裝過程中提示設定 MySQL 的 root 使用者密碼,因為 root 帳戶預設已經不再使用密碼的來做驗證,對於不熟悉 MySQL 操作的使用者可能會造成一些困擾,畢竟這樣就無法直接在安裝 MySQL 後透過 phpMyAdmin 的方式來操作資料庫或建立使用者了,更別說有些使用者可能會直接使用 root 的帳戶給應用程式如 WordPress 或 Joomla 、Drupal 等系統使用,那如果想要透過密碼登入 MySQL 資料庫該怎麼做呢?
- 把 root 改為使用密碼驗證登入
- 另外建立一個透過密碼驗證登入的使用者
建議使用第二種方式會比較安全一些,這樣一來就只有能取得本機 root 權限的使用者能夠登入 root 帳戶,而不用擔心從應用程式面可以進行密碼暴力攻擊。兩種做法都必須使用到 MySQL command-line client 來操做,但過程並不會很複雜,以下簡單說明
把 root 改為使用密碼驗證登入的方式:
在任一 command-line shell 透過 sudo 或切換到 root 使用者執行 mysql 指令進行 MySQL command-line 操作:
$ sudo mysql

Welcome to the MySQL monitor.  Commands end with ; or \g.
Your MySQL connection id is 4
Server version: 5.7.28-0ubuntu0.18.04.4 (Ubuntu)

Copyright (c) 2000, 2019, Oracle and/or its affiliates. All rights reserved.

Oracle is a registered trademark of Oracle Corporation and/or its
affiliates. Other names may be trademarks of their respective
owners.

Type 'help;' or '\h' for help. Type '\c' to clear the current input statement.

mysql>
看到 mysql> 提示字串就表示成功登入了,因為預設是使用 UNIX Socket 判斷使用者,只要是 root 就可以直接登入,所以這邊不需要密碼,接下來先確認狀況如同這邊的描述,進到 MySQL 後透過 SQL 語法查詢:
mysql> SELECT user, authentication_string, plugin, host FROM mysql.user WHERE user = 'root';以上查詢會得到這樣的結果,可以看到 root 使用 auth_socket plugin 且 authentication_string 為空:
+------+-----------------------+-------------+-----------+
| user | authentication_string | plugin      | host      |
+------+-----------------------+-------------+-----------+
| root |                       | auth_socket | localhost |
+------+-----------------------+-------------+-----------+
1 row in set (0.00 sec)
這邊透過 ALTER 語法把 root 登入的方式改為密碼驗證,在最後 password 的地方改為自己要設定的密碼即可:
mysql> ALTER USER 'root'@'localhost' IDENTIFIED WITH mysql_native_password BY 'password';
Query OK, 0 rows affected (0.06 sec)
再次透過同樣的 SELECT 語法確認,可以看到 authentication_string 已經有密碼的雜湊值、plugin 已經從 auth_socket 變為 mysql_native_password ::
mysql> SELECT user, authentication_string, plugin, host FROM mysql.user WHERE user = 'root';
+------+-------------------------------------------+-----------------------+-----------+
| user | authentication_string                     | plugin                | host      |
+------+-------------------------------------------+-----------------------+-----------+
| root | *2470C0C06DEE42FD1618BB99005ADCA2EC9D1E19 | mysql_native_password | localhost |
+------+-------------------------------------------+-----------------------+-----------+
1 row in set (0.00 sec)
這時就可以做 FLUSH PRIVILEGES 的操作讓上述修改生效:
mysql> FLUSH PRIVILEGES;再執行 exit 或 quit 指令結束這次的 MySQL 操作,準備實際測試看看是不是已經不能直接透過系統的 root 身份登入 MySQL 、而是必須透過密碼的方式進行驗證
再次透過 sudo 使用 root 身份執行 mysql 指令,果然已經不能登入:
$ sudo mysql
ERROR 1045 (28000): Access denied for user 'root'@'localhost' (using password: NO)
這時透過 -u 參數指定使用者為 root 並且加上 -p 的參數讓 MySQL 詢問密碼,已經可以順利登入了:
$ mysql -u root -p
Enter password:
Welcome to the MySQL monitor.  Commands end with ; or \g.
Your MySQL connection id is 5
Server version: 5.7.28-0ubuntu0.18.04.4 (Ubuntu)

Copyright (c) 2000, 2019, Oracle and/or its affiliates. All rights reserved.

Oracle is a registered trademark of Oracle Corporation and/or its
affiliates. Other names may be trademarks of their respective
owners.

Type 'help;' or '\h' for help. Type '\c' to clear the current input statement.

mysql>
透過 select CURRENT_USER(); 查詢確認身份是 root 無誤:
mysql> select CURRENT_USER();
+----------------+
| CURRENT_USER() |
+----------------+
| root@localhost |
+----------------+
1 row in set (0.00 sec)
到這邊就確認 root 可以使用密碼沒問題了,如果還要順便建立資料庫的話可以往下繼續看
第二種作法:另外建立一個透過密碼驗證登入的使用者
同樣先透過 root 身份執行 mysql 指令:
$ sudo mysql

Welcome to the MySQL monitor.  Commands end with ; or \g.
Your MySQL connection id is 6
Server version: 5.7.28-0ubuntu0.18.04.4 (Ubuntu)

Copyright (c) 2000, 2019, Oracle and/or its affiliates. All rights reserved.

Oracle is a registered trademark of Oracle Corporation and/or its
affiliates. Other names may be trademarks of their respective
owners.

Type 'help;' or '\h' for help. Type '\c' to clear the current input statement.

mysql>
再來透過 CREATE 語法建立使用者,user_name 的地方是使用者名稱、password 的地方是密碼、localhost 是指定這個使用者可以登入的來源,這邊預設為本機,如果要允許遠端登入則可以改為對應的 IP 位置 (在同一台主機上跑 WordPress 等網站應用程式或 phpMyAdmin 資料庫管理程式就不必修改,因為是 “本機” 連線),以上都可以按照需求換成自己要的值:
mysql> CREATE USER 'user_name'@'localhost' IDENTIFIED BY 'password';
Query OK, 0 rows affected (0.30 sec)
透過 SELECT 語法確認使用者已經成功被建立:
mysql> SELECT user, authentication_string, plugin, host FROM mysql.user WHERE user = 'user_name';
+-----------+-------------------------------------------+-----------------------+-----------+
| user      | authentication_string                     | plugin                | host      |
+-----------+-------------------------------------------+-----------------------+-----------+
| user_name | *2470C0C06DEE42FD1618BB99005ADCA2EC9D1E19 | mysql_native_password | localhost |
+-----------+-------------------------------------------+-----------------------+-----------+
1 row in set (0.01 sec)
沒問題就可以執行 exit 或 quit 指令離開
此時透過 mysql 指令加上 -u 參數指定使用者、以及 -p 參數讓 MySQL 詢問密碼,接著輸入剛剛設定的密碼,確認已經可以順利使用新的使用者登入了,select CURRENT_USER(); 也可以看到是新建立的使用者沒錯:
$ mysql -u user_name -p
Enter password:
Welcome to the MySQL monitor.  Commands end with ; or \g.
Your MySQL connection id is 7
Server version: 5.7.28-0ubuntu0.18.04.4 (Ubuntu)

Copyright (c) 2000, 2019, Oracle and/or its affiliates. All rights reserved.

Oracle is a registered trademark of Oracle Corporation and/or its
affiliates. Other names may be trademarks of their respective
owners.

Type 'help;' or '\h' for help. Type '\c' to clear the current input statement.

mysql> select CURRENT_USER();
+---------------------+
| CURRENT_USER()      |
+---------------------+
| user_name@localhost |
+---------------------+
1 row in set (0.01 sec)
到這邊密碼登入就確認完成了
不過新建立的使用者預設沒有任何資料庫的權限,此時執行 show DATABASES; 查詢應該只會看到以下結果:
mysql> show DATABASES;
+--------------------+
| Database           |
+--------------------+
| information_schema |
+--------------------+
1 row in set (0.01 sec)
我們可以先透過 root 的身份登入,建立資料庫並給予新的使用者權限,例如我想建立名為 WordPress 的資料庫:
mysql> CREATE DATABASE WordPress;
Query OK, 1 row affected (0.20 sec)
還要給予剛剛新建的使用者資料庫的權限,否則這個新建的使用者身份還是看不到我們剛剛建立的資料庫的
透過 GRANT 語法來給予使用者權限:
mysql> GRANT ALL PRIVILEGES ON WordPress.* TO 'user_name'@'localhost';這邊簡單說明一下。因為要直接給予全部操作的權限,所以是 ALL privileges ,如果不需要全部操作的權限、例如只需要查詢或插入資料,則可以改成對應的 SELECT 、INSERT 等,而 WordPress 是給予權限的資料庫名稱,改為 * 則可以給予使用者所有資料庫的權限,一般來說不建議這樣做,盡量只給予真正有需要的權限即可,至於語法上已經存在的 * 則表示是生效在這個資料庫底下所有的 Table (資料表) 上,改為對應的資料表名稱則此次的調整只會作用在對應的資料表上,更多細節就不在這邊提了,只抓重點就好。
給完權限後再改使用新建立的使用者身份登入,執行 show DATABASES; 查詢就會看到新建立的資料庫了:
mysql> show databases;
+--------------------+
| Database           |
+--------------------+
| information_schema |
| WordPress          |
+--------------------+
2 rows in set (0.00 sec)
接下來要架設 WordPress 或是其他需要使用到 MySQL 資料庫的應用程式就能順利往下進行,只要在安裝設定過程中對應的設定頁面輸入剛剛建立的使用者帳號、密碼以及資料庫名稱就可以了!