清除 Public DNS 服務快取的管道

當 DNS 紀錄有更動的時候,為了盡快看到並確認結果,我們會想要在紀錄的存活時間 (TTL, Time To Live) 到期之前就手動清除瀏覽器或是系統上的 DNS 紀錄快取資料 (例如像 Flush local DNS cache on a browser and local system 這邊有紀錄了幾個常用的方式),但這僅限於我們手邊的裝置,如果 DNS 伺服器上面的紀錄仍然是被快取過的結果,清除本機的快取可能就派不上用場了。

如果想要清除 DNS 伺服器上的快取紀錄該怎麼做呢?如果是自己管理的 DNS 伺服器,可以透過重新啟動服務等方式清除快取,但如果不是自己管理的伺服器應該怎麼辦呢?

例如,自己手上管理的某套服務剛做完 DNS 紀錄變更,我希望使用者也能盡快拿到最新的結果,而不是查詢到被快取在伺服器上面的舊版紀錄,但是大多數的使用者使用的肯定都不是我管理的 DNS,也就是不在我的控制範圍內,比較常見的狀況可能是使用 ISP 預設提供的 DNS 服務,或是其他大型企業提供的 Public DNS 服務 (例如:常用 Public DNS resolver 清單整理 這邊鎖整理),這時候要怎麼做才可以讓使用者更快取得新的 DNS 紀錄而不必等到 TTL 都到期呢?
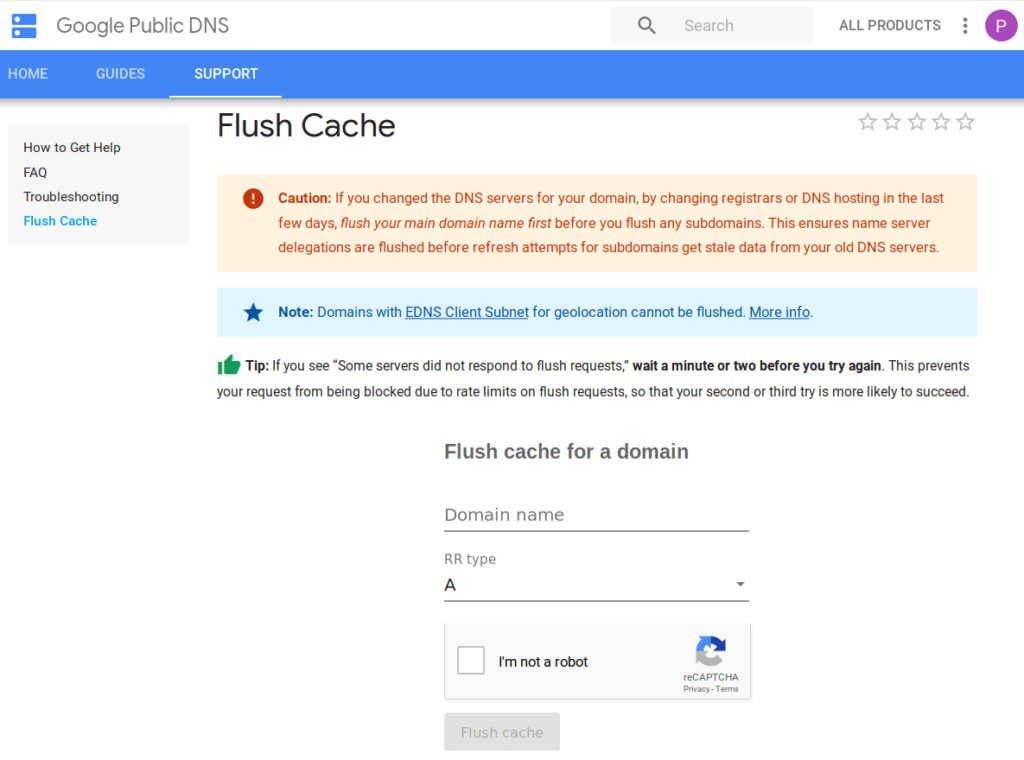
Google Public DNSCloudflare 1.1.1.1 兩家知名的 Public DNS 服務就有對外提供 Flush Cache / Purge Cache 的功能,界面都相當簡潔,只要輸入對應的網域名稱 (Domain name) 、資源紀錄類型 (Record type),就可以很方便、快速的清除快取紀錄,讓最新的設定能盡快生效,他們的網址分別是:

Google Public DNS 的 Flush Cache 界面
閱讀全文

Flush local DNS cache on a browser and local system

Browser(application) level:

For Google Chrome/Chromium, open the link below:
chrome://net-internals/#dns
and click “Clear host cache

For Firefox, open the link below:
about:config
then click “I’ll be careful, I promise!“,
and find network.dnsCacheExpiration, set its value to 0 (create one if it didn’t exist).
Now the cache should be flushed, and set network.dnsCacheExpiration back to 3600, or you the cache will not work at all.

Operating system level:

  • Windows:
    • ipconfig /flushdns
  • Linux:
    Depends on the dns service you are using: 
    • sudo systemd-resolve --flush-caches
    • sudo /etc/init.d/dns-clean restart
    • sudo /etc/init.d/nscd restart
    • sudo /etc/init.d/dnsmasq restart
    • sudo /etc/init.d/named restart
  • macOS (> v10.5):
    • dscacheutil -flushcache