Ubuntu based GNU/Linux 上的防火牆 (ufw) 基本設定

早期在 Linux 上設定防火牆多事透過 iptables 這隻程式在下規則,不過說真的,對於新手或是要求很基本的使用者來說,iptables 有些功能其實用不到,例如 nat, forward等等的, 而且語法有點複雜,我自己也是常常要邊翻 man page 、筆記邊操作,後來有了令一套全名叫作 Uncomplicated Firewall 的 ufw,意思就是簡單的、不複雜的防火牆,相對於 iptables 來說,ufw 是真的簡單很多了!ufw其實只是一個 iptables 的前端設定程式,最後的規則都還是會走 iptables ,而且比較複雜的功能還是要直接透過 iptables 才有辦法做到!如果想看 ufw 設定完的 iptables 結果只要用這個命令就可以看到了:iptables -L -n

今天來講一下 ufw 的 “基本” 使用方式,Ubuntu 14.04 有內建 ufw,Debian要自行安裝,透過 apt-get 就可以了:

$ sudo apt-get install ufw

接下來示範的操作都在 Ubuntu 14.04 上面進行,不同的系統可能會略有出入,但應該都大同小異。

ufw 預設是停用的,要啟用 ufw 的話命令如下,關鍵字分別是 enable 和 disable,也就是啟用和停用,因為需要 root 權限,所以命令前面會加上 sudo:

$ sudo ufw enable
 Firewall is active and enabled on system startup

同樣的,停用 ufw 會這樣做:

$ sudo ufw disable
 Firewall stopped and disabled on system startup

要確認 ufw 已經啟用,可以看一下 ufw 的 status:

已啟用的結果:

$ sudo ufw status
Status: active

未啟用的結果:

$ sudo ufw status
Status: inactive

那防火牆的允許跟禁止規則怎麼下呢?
關鍵字是 allow 跟 deny,allow 表示允許,deny 表示拒絕

先講怎麼設定防火牆預設行為,也就是對於沒有手動設定規則的連線該怎麼處理

比較安全的設定方式,建議把預設連入設定為 deny ,也就是沒有手動設定允許通過的連線就會被擋下來:

$ sudo ufw default deny

明確一點的指令是這樣:

$ sudo ufw default deny incoming
閱讀全文

Convert your Ubuntu/Debian between different versions, like Desktop to Server

There is a very useful tool under Debian/Ubuntu GNU/Linux called tasksel, which can help us “convert” our Debian/Ubuntu between versions.

Install via apt-get/aptitude:

peter@peter-lab ~ $ sudo apt-get install tasksel
[sudo] password for peter:
Reading package lists... Done
Building dependency tree
Reading state information... Done
The following extra packages will be installed:
tasksel-data
The following NEW packages will be installed:
tasksel tasksel-data
0 upgraded, 2 newly installed, 0 to remove and 46 not upgraded.
Need to get 36.0 kB of archives.
After this operation, 385 kB of additional disk space will be used.
Do you want to continue? [Y/n]
Get:1 http://ubuntu.mirror/ubuntu/ trusty/main tasksel-data all 2.88ubuntu15 [6,366 B]
Get:2 http://ubuntu.mirror/ubuntu/ trusty/main tasksel all 2.88ubuntu15 [29.7 kB]
Fetched 36.0 kB in 0s (363 kB/s)
Preconfiguring packages ...
Selecting previously unselected package tasksel-data.
(Reading database ... 229261 files and directories currently installed.)
Preparing to unpack .../tasksel-data_2.88ubuntu15_all.deb ...
Unpacking tasksel-data (2.88ubuntu15) ...
Selecting previously unselected package tasksel.
Preparing to unpack .../tasksel_2.88ubuntu15_all.deb ...
Unpacking tasksel (2.88ubuntu15) ...
Processing triggers for man-db (2.6.7.1-1ubuntu1) ...
Processing triggers for menu (2.1.46ubuntu1) ...
Setting up tasksel-data (2.88ubuntu15) ...
Setting up tasksel (2.88ubuntu15) ...
Processing triggers for menu (2.1.46ubuntu1) ...

and run:

peter@peter-lab ~ $ sudo tasksel

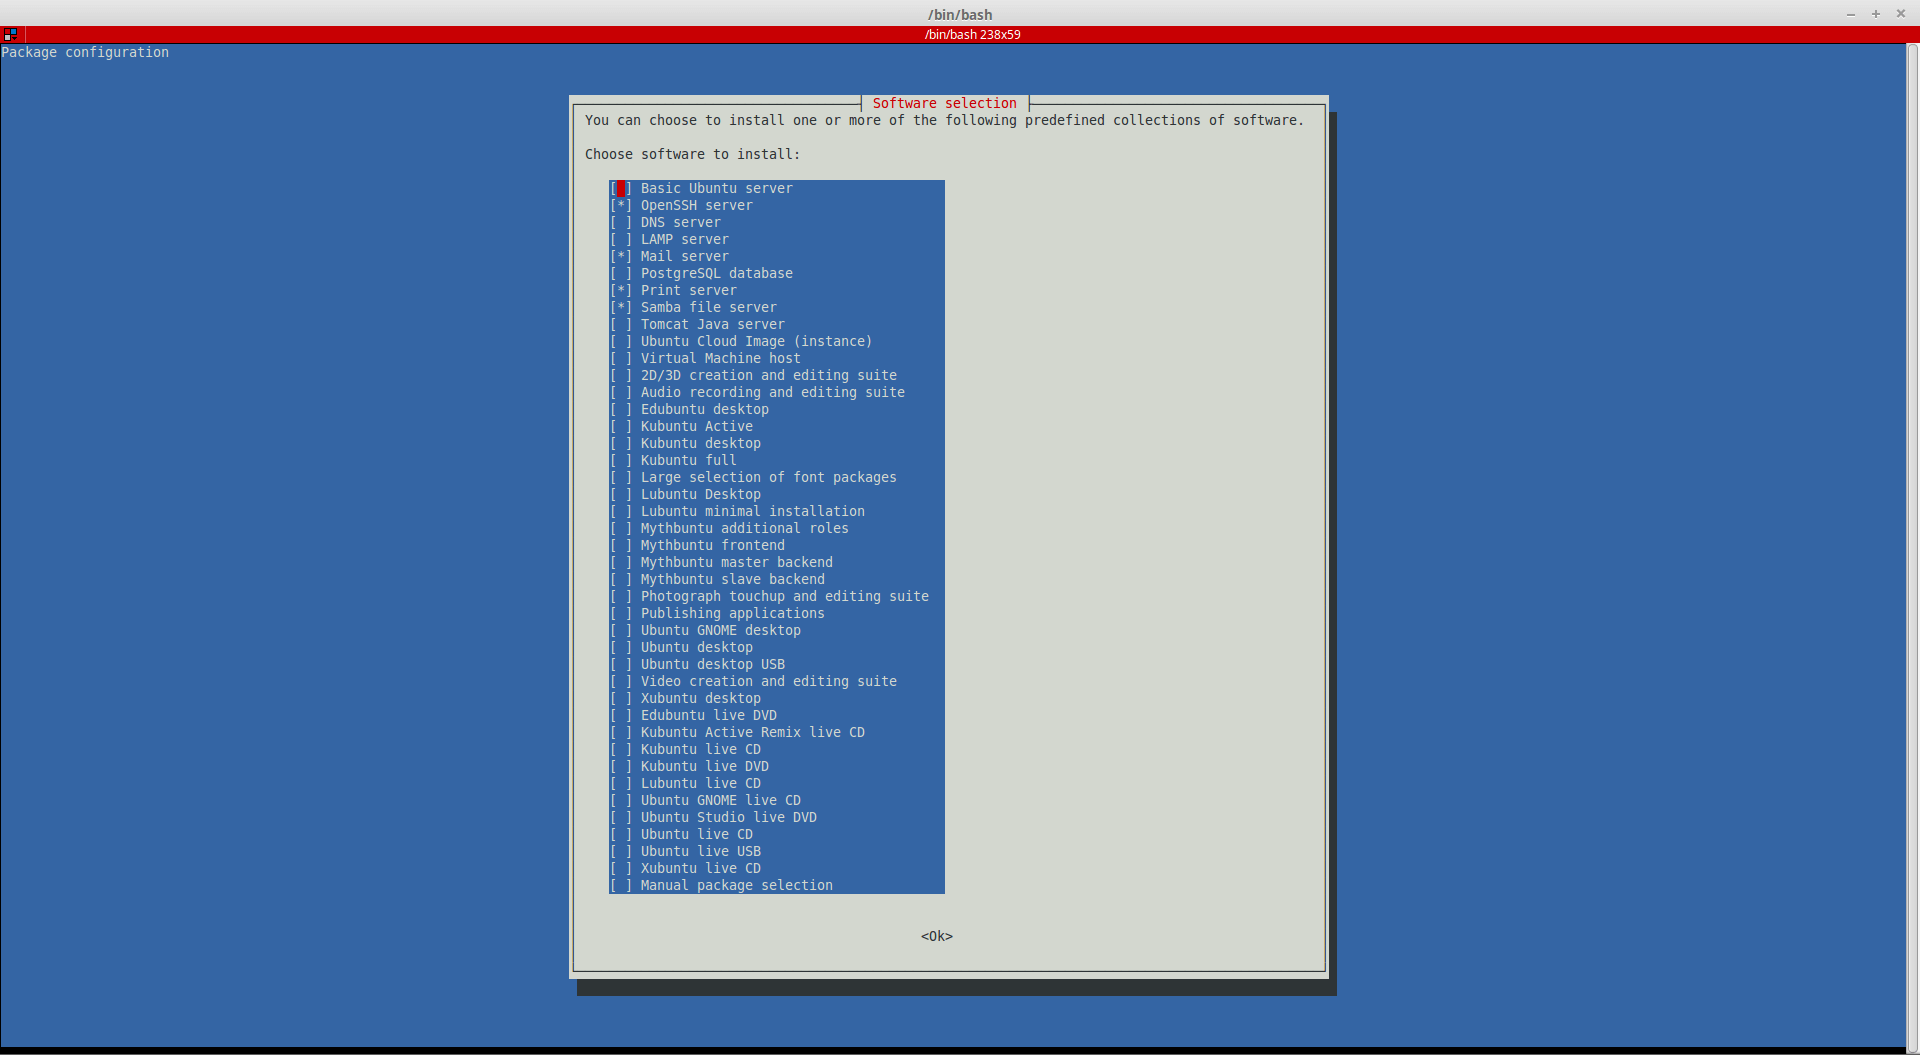
It’ll show you a menu like this:

tasksel_menu
閱讀全文

Remotely shutdown/restart Windows via Linux on Debian/Ubuntu based Linux

Need samba-common package first, install via apt:

$ sudo apt-get install samba-common

Then use this command to shutdown the computer remotely(replace ip, username and password with your own):

$ net rpc shutdown --ipaddress ip --user username%password

Add -r if you want to restart, not shutdown:

$ net rpc shutdown -r --ipaddress ip --user username%password

After execution, here is the success message:

Shutdown of remote machine succeeded

If receive these messages below means something failed:

Could not connect to server 192.168.1.55
Connection failed: NT_STATUS_IO_TIMEOUT
Connection failed: NT_STATUS_RESOURCE_NAME_NOT_FOUND
Could not initialise pipe winreg. Error was NT_STATUS_OBJECT_NAME_NOT_FOUND

There are many functions provide by net [rpc], like:

net rpc audit Modify global audit settings
net rpc info Show basic info about a domain
net rpc join Join a domain
net rpc oldjoin Join a domain created in server manager
net rpc testjoin Test that a join is valid
net rpc user List/modify users
net rpc password Change a user password
net rpc group List/modify groups
net rpc share List/modify shares
net rpc file List open files
net rpc printer List/modify printers
net rpc changetrustpw Change trust account password
net rpc trustdom Modify domain trusts
net rpc abortshutdown Abort a remote shutdown
net rpc shutdown Shutdown a remote server
net rpc samdump Dump SAM data of remote NT PDC
net rpc vampire Sync a remote NT PDC’s data into local passdb
net rpc getsid Fetch the domain sid into local secrets.tdb
net rpc rights Manage privileges assigned to SID
net rpc service Start/stop/query remote services
net rpc registry Manage registry hives
net rpc shell Open interactive shell on remote server
net rpc trust Manage trusts
net rpc conf Configure a remote samba server

Check man rpc for more details!

Convert ext3 to ext4 filesystem on Debian Wheezy

老調重彈了,最近又再做這件事是因為Proxmox VE預設是用ext3當作檔案系統,某一台機器因為有點問題,灌Proxmox的時候一開始沒打算要當正式系統,也就沒特別改設定,但灌好後因為懶了 … 就直接上線了 … 偶然發現這個問題,順便重新作一下筆記怎麼樣轉到ext4,轉到ext4的好處以及效能差異就不用多說了,幾乎是完剩ext2、ext3,好檔案系統,不轉嗎?

如果懶的話,最簡單的方法就是去改fstab,直接把ext3掛成ext4,效能就可以有所提升,但只能使用到那些不需要修改到檔案系統的功能,並且可以重新用ext3的方式掛載,而要有比較完整的轉換則要做以下動作:

  1. 把要做轉換的分區umount(如果是root filesystem就進single user mode或用其他系統開機吧),DEV自行替換成對應代號
    # umount /dev/DEV

  2. 先做一次fsck
    # e2fsck -fyv /dev/DEV

  3. 沒問題的話就可以把ext4的功能打開了,這邊要注意 … 這是不可逆的操作,並且要和下個動作連貫完成
    # tune2fs -O extents,uninit_bg,dir_index /dev/DEV

  4. 調整完後要修一下(這邊會看到找到錯誤是正常現象)
    # e2fsck -fyvDC0 /dev/DEV

  5. 調整fstab的掛載格式
    -> 自己去fstab理面把該分區的ext3改成ext4吧!

  6. 重組
    # e4defrag -c -v /dev/DEV
    -> ext4開始使用extents來取代傳統的block mapping,在對大檔案操作時能有顯著的效能提升,而這部份是在剛剛的轉換沒有做的(tuen2fs只有把feature打開而以),轉換完成後新增的檔案自然是都會使用到這樣的功能,但原先已經存在於filesystem上的檔案必須要到下次被寫入時才會以新的方式寫入,但系統上有不少檔案是久久才會寫一次但可能經常要被讀取的,在被重新寫入以前便無法享受到這樣的效能改善,所以這邊透過e4defrag來幫我們做這件事!

過程中如果有出現錯誤的話就先解掉再往下一步走,像fsck這種工作做完一次還可以做第二次確保都沒問題了再往下走,過程並不複雜,剛好也可以順便檢查檔案系統有沒有問題,比較麻煩的大概就是root filesystem因為要unmount所以系統必須停機,但換來的效能是值得的!

(我之前硬碟壞掉就會出現fsck永遠修不完的現象,每次抓到的錯誤都不一樣,修完一次下次還是有得修,那很明顯是硬碟壞了)