Exif, stands for Exchangeable image file format, which we usually use to recognize the camera manufacturer, model, exposure time in a digital photo, it is a standard that specifies the formats for images, sound, and ancillary tags used by digital cameras (or digital devices in nowadays, like smart phones and tablets), scanners and other systems handling image and sound files recorded by digital cameras.

Exif can help us know more about the photos and audios, but may also leaks the valuable and privacy info if you don’t want to let others know that you just want to share pictures with others, it will also cost a small disk space, but if you don’t need it or you don’t want it, it’s also a waste of disk space, so you may want to remove that info like me in some situation. Here is the steps to remove Exif under command line.
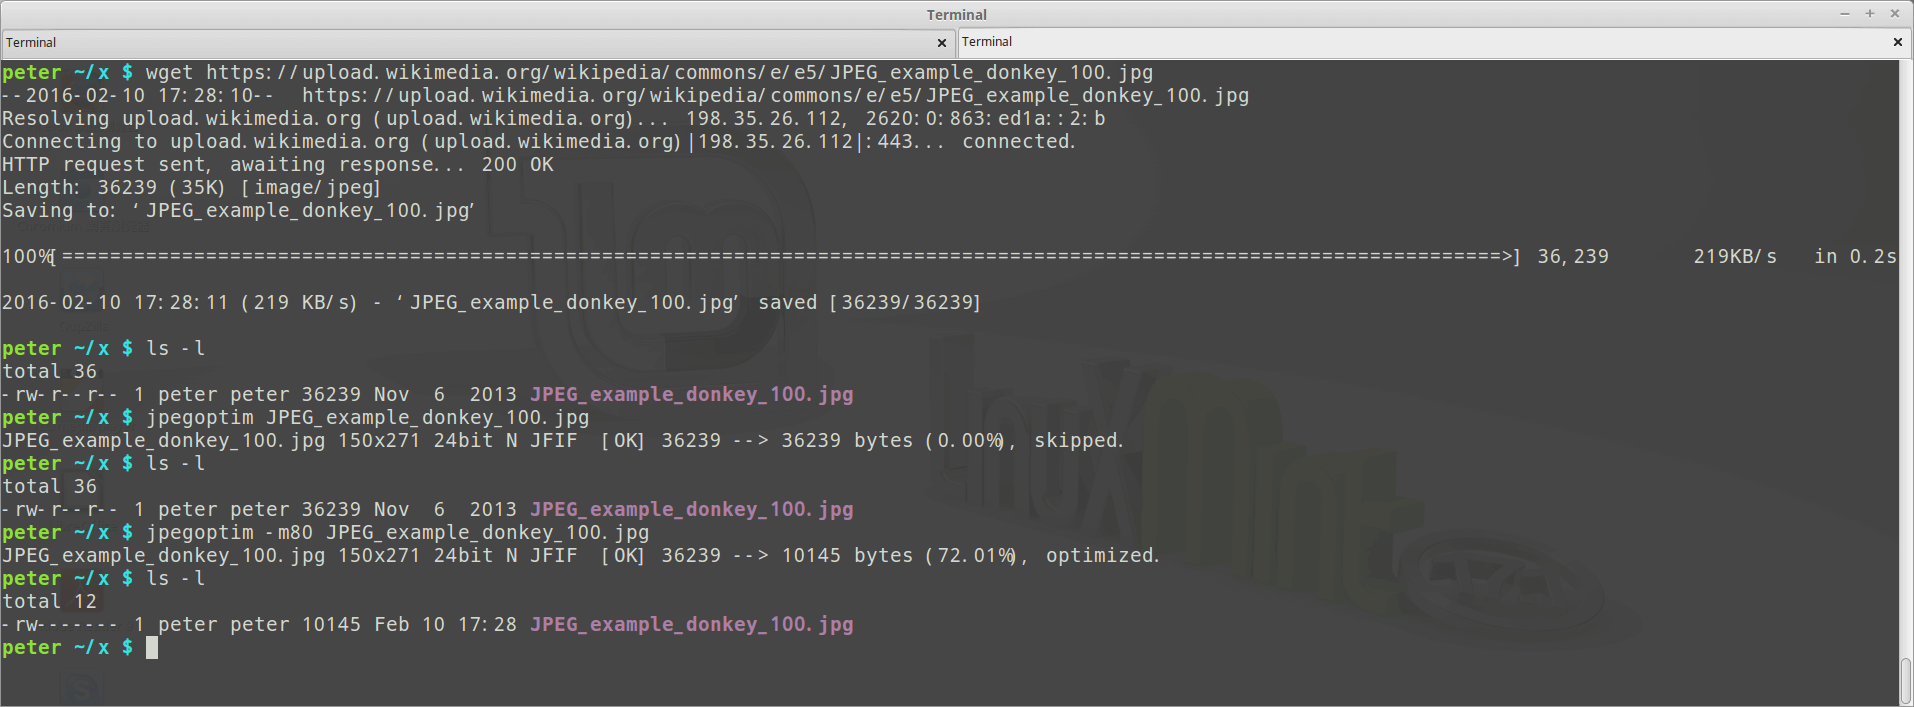
Install exiftool:
$ sudo pkg install p5-Image-ExifTool # FreeBSD
$ sudo apt-get install libimage-exiftool-perl # Debian / Ubuntu based GNU/Linux
$ sudo yum install perl-Image-ExifTool # RedHat / Fedora based GNU/Linux
Make sure you can now use exiftool:
$ exiftool -ver # show the installed version of exiftool
9.46
If you would like to see the current exist info, use this command, filename.jpg is the picture you want to manipulate:
$ exiftool -all filename.jpgNow you can remove Exif info:
$ exiftool -all= filename.jpgBy default, it will backup your file to filename_oringinal, like filename.jpg -> filename.jpg_original, so you don’t need to worry about the backup, if you don’t want it, you can also add parameter -overwrite_original to prevent to backup file been generated.
After you remove the Exif info, you will find the modified file be a little bit smaller now.
$ exiftool -all= filename.JPG
1 image files updated

$ ls -l
-rw-r--r-- 1 peter peter 1609796 Apr 24 16:09 filename.jpg
-rw-r--r-- 1 peter peter 1614079 Apr 24 16:08 filename.jpg_original
If you take a look at its info, you will find that there are only some basic info remaining:
$ exiftool -all filename.jpg
ExifTool Version Number : 10.10
File Name : DSC_0470.JPG
Directory : .
File Size : 1572 kB
File Modification Date/Time : 2016:04:24 16:09:43+08:00
File Access Date/Time : 2016:04:24 16:09:43+08:00
File Inode Change Date/Time : 2016:04:24 16:09:43+08:00
File Permissions : rw-r--r--
File Type : JPEG
File Type Extension : jpg
MIME Type : image/jpeg
Image Width : 3920
Image Height : 2204
Encoding Process : Baseline DCT, Huffman coding
Bits Per Sample : 8
Color Components : 3
Y Cb Cr Sub Sampling : YCbCr4:2:0 (2 2)
Image Size : 3920x2204
Megapixels : 8.6
That’s all.