Use ‘jpegoptim’ to optimize/re-compress your jpg images

I use optipng and jpegoptim to help me compress/optimize my jpg/png images.

For png images re-compression, please refer to:

jpegoptim supports many platform, including Solaris, Mac OS X and Windows, of course FreeBSD and Linux, here is its git repository on GitHub:
https://github.com/tjko/jpegoptim

How to install?

FreeBSD:

$ sudo pkg install jpegoptim

For Debian/Ubuntu based GNU/Linux:

$ sudo apt-get install jpegoptim

For CentOS/RHEL/Fedora based GNU/Linux

$ sudo yum install jpegoptim

(on CentOS/RHEL, please enable EPEL repo first)

How to use?

$ jpegoptim image.jpg

By default, jpegoptim uses ‘lossless‘ mode to re-compress the jpeg images, which means the optimized images will have the same quality just like it was, to make the images smaller, you can use -m<quality>, --max=<quality> to enable lossy optimize by setting its quality, the valid range is 0 – 100, for example, set quality = 90:

$ jpegoptim -m 90 example.jpg

Note that the files that already have lower quality setting will be compressed using the lossless optimization method.

You can also use `find` to help you compress all the jpeg images:

$ find /path/to/imgs -name "*.jpg" -exec jpegoptim -m 90 {} \;

Using this picture on Wikipedia as an exmaple: https://wikipedia.org/wiki/File:JPEG_example_donkey_100.jpg

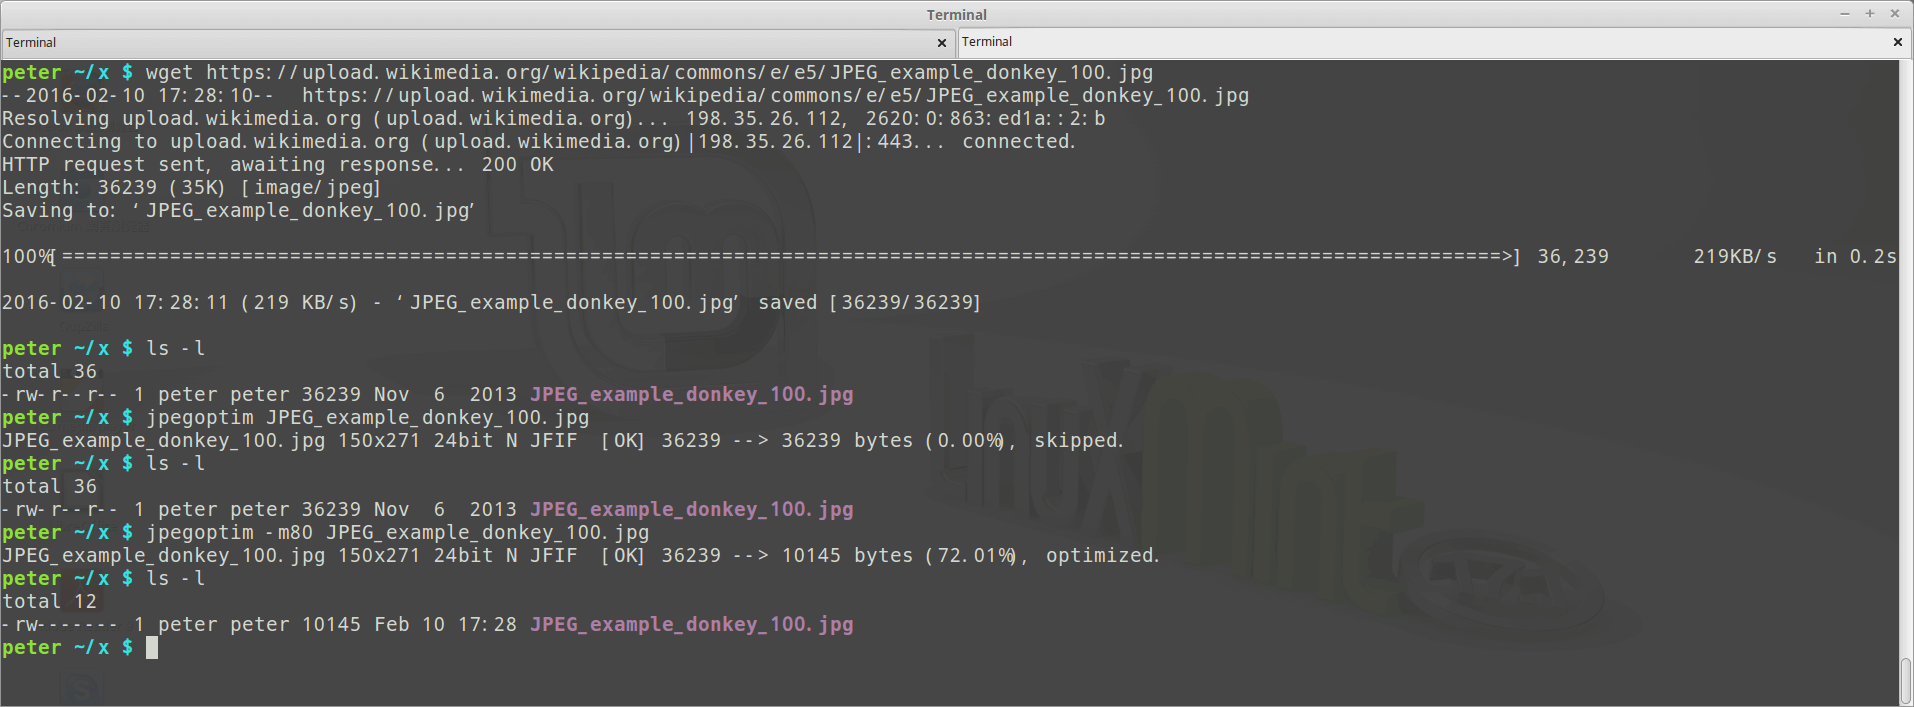
Before the compression, 36239 bytes (about 36 KB):


After the compression, 10145 bytes (about 10 KB):

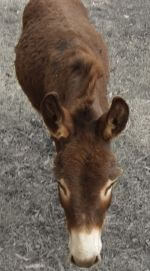
Can you recognize which one has better/lower quality? :D

簡易反轉 PDF 顏色和把 PDF 轉成圖檔的方法

這篇要用的工具是 ImageMagick (wiki)

imagemagick 是一套不管是在 Linux, FreeBSD, Windows 或 Mac OS X 上都很容易取得的工具,其主要功能是各種圖檔的檢視、編輯、轉換

FreeBSD 安裝: $ sudo pkg install ImageMagick
Debian / Ubuntu based GNU/Linux 安裝: $ sudo apt-get install imagemagick
CentOS / Fedora based GNU/Linux 安裝: $ sudo yum install ImageMagick
Mac OS X 使用 MacPorts 安裝: $ sudo port install ImageMagick
Mac OS X 使用 Homebrew 安裝: $ brew install imagemagick

嫌版本太舊、或是上面沒提到、還是沒有套件管理功能的作業系統請自己從這邊找:http://imagemagick.org/script/binary-releases.php

安裝完 ImageMagick 後會有一個 convert 的 command 可以用

閱讀全文

Use ‘optipng’ to optimize/re-compress your png images losslessly!

OptiPNG is a useful tool to compress png images without loss its quality, it really help reduce the bandwidth, diskspace and the loading/response time for website. I used it to re-compress all the png images on cdnjs and successfully made 206857 images smaller(see cdnjs/cdnjs@e936c87e9044fd2b123).

It’s easy to use, you can install it via apt-get, or download and build it from source :
$ sudo apt-get install optipng

Usage:
$ optipng example.png

The default compress level is 2, the range is 0~7 (may depends on the version you are using), I will always use the highest and slowest level:
$ optipng -o7 example.png

Find all the png images to compress:
$ find path -name "*.png" -exec optipng -o7 {} \;

In fact, optipng can convert BMP, GIF, PNM and TIFF format image to optimized optimized png, and also performs PNG integrity checks and corrections, very nice.