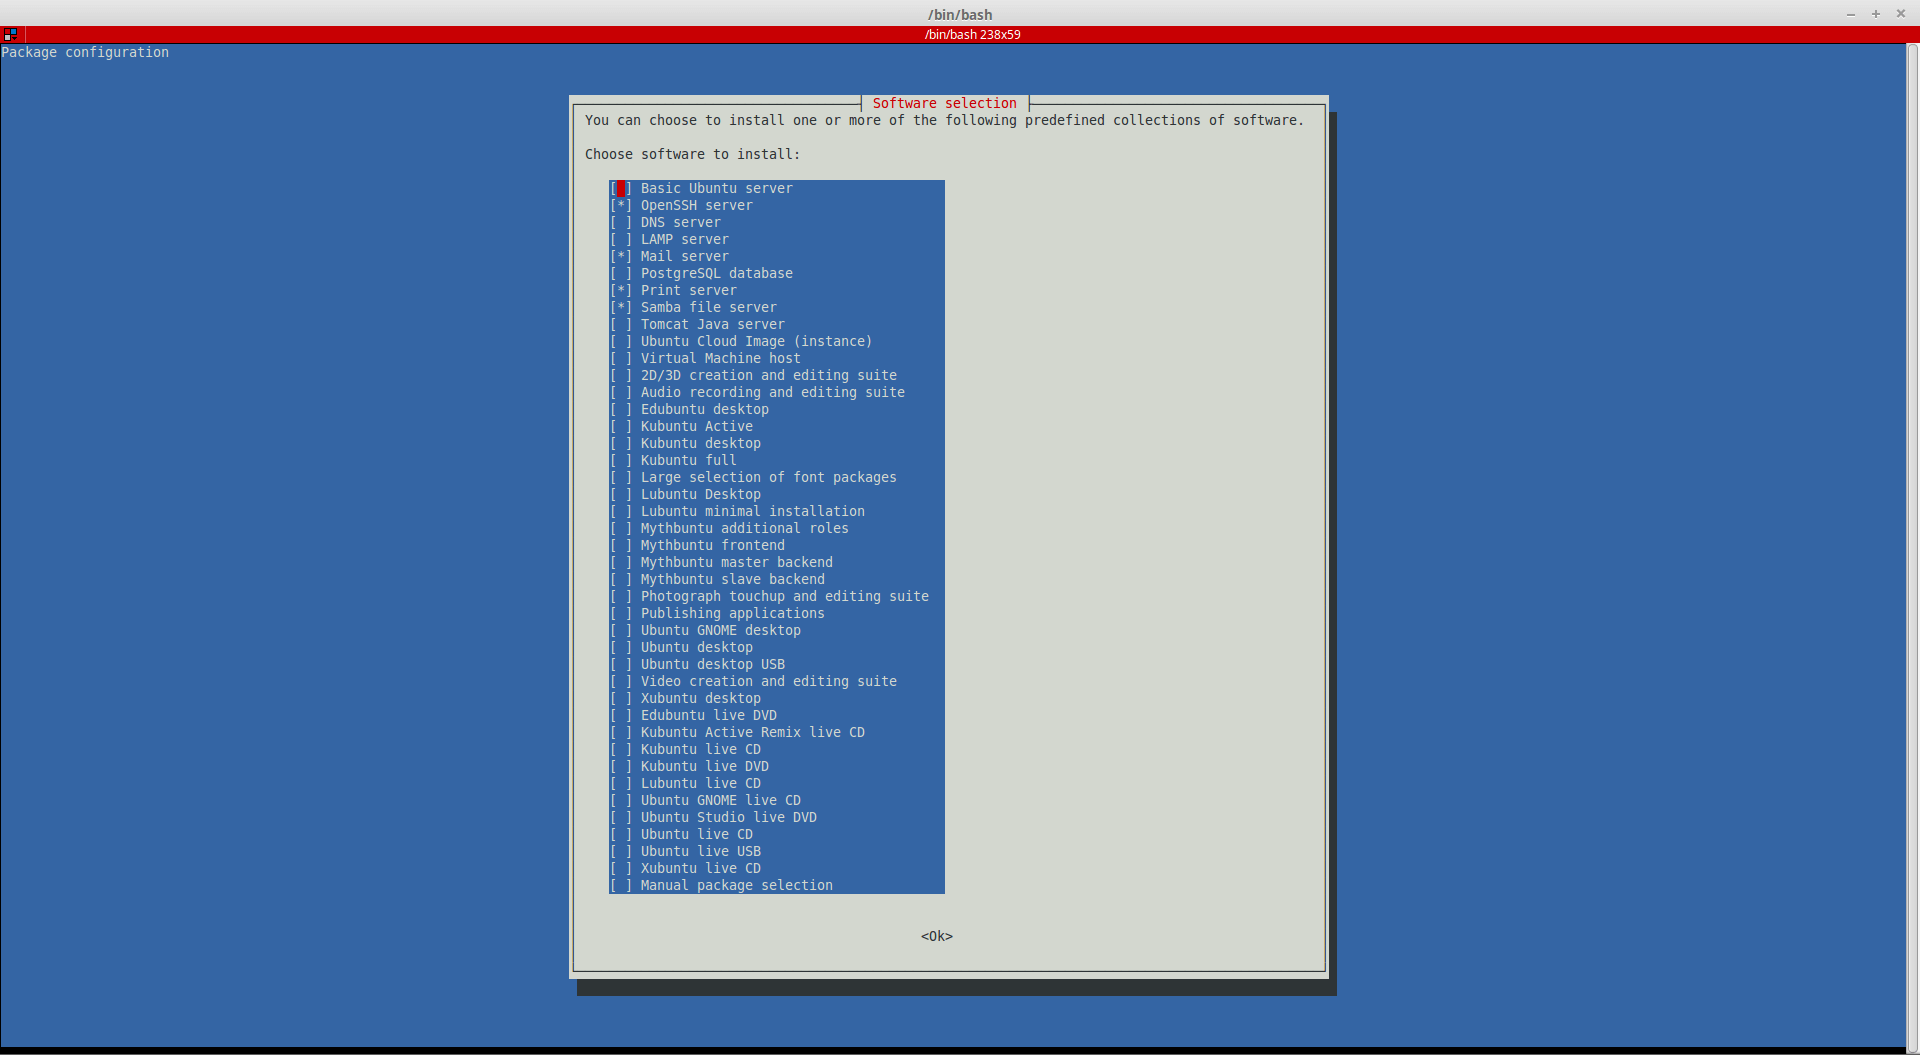
There is a very useful tool under Debian/UbuntuGNU/Linux called tasksel, which can help us “convert” our Debian/Ubuntu between versions.
Install via apt-get/aptitude:
peter@peter-lab ~ $ sudo apt-get install tasksel
[sudo] password for peter:
Reading package lists... Done
Building dependency tree
Reading state information... Done
The following extra packages will be installed:
tasksel-data
The following NEW packages will be installed:
tasksel tasksel-data
0 upgraded, 2 newly installed, 0 to remove and 46 not upgraded.
Need to get 36.0 kB of archives.
After this operation, 385 kB of additional disk space will be used.
Do you want to continue? [Y/n]
Get:1 http://ubuntu.mirror/ubuntu/ trusty/main tasksel-data all 2.88ubuntu15 [6,366 B]
Get:2 http://ubuntu.mirror/ubuntu/ trusty/main tasksel all 2.88ubuntu15 [29.7 kB]
Fetched 36.0 kB in 0s (363 kB/s)
Preconfiguring packages ...
Selecting previously unselected package tasksel-data.
(Reading database ... 229261 files and directories currently installed.)
Preparing to unpack .../tasksel-data_2.88ubuntu15_all.deb ...
Unpacking tasksel-data (2.88ubuntu15) ...
Selecting previously unselected package tasksel.
Preparing to unpack .../tasksel_2.88ubuntu15_all.deb ...
Unpacking tasksel (2.88ubuntu15) ...
Processing triggers for man-db (2.6.7.1-1ubuntu1) ...
Processing triggers for menu (2.1.46ubuntu1) ...
Setting up tasksel-data (2.88ubuntu15) ...
Setting up tasksel (2.88ubuntu15) ...
Processing triggers for menu (2.1.46ubuntu1) ...
Got a problem that the usb mouse will been poweroff/suspend periodically on Linuxmint 17 when the notebook is not in ac mode, here is a quick fix without rebooting system:
echo "-1" | sudo tee /sys/bus/usb/devices/*/power/autosuspend_delay_ms
echo "on" | sudo tee /sys/bus/usb/devices/*/power/control
For permanent change, for example on Debian / Ubuntu based GNU/Linux, with usbcore module:
Then use this command to shutdown the computer remotely(replace ip, username and password with your own):
$ net rpc shutdown --ipaddress ip --user username%password
Add -r if you want to restart, not shutdown:
$ net rpc shutdown -r --ipaddress ip --user username%password
After execution, here is the success message:
Shutdown of remote machine succeeded
If receive these messages below means something failed:
Could not connect to server 192.168.1.55 Connection failed: NT_STATUS_IO_TIMEOUT Connection failed: NT_STATUS_RESOURCE_NAME_NOT_FOUND Could not initialise pipe winreg. Error was NT_STATUS_OBJECT_NAME_NOT_FOUND
There are many functions provide by net [rpc], like:
net rpc audit Modify global audit settings net rpc info Show basic info about a domain net rpc join Join a domain net rpc oldjoin Join a domain created in server manager net rpc testjoin Test that a join is valid net rpc user List/modify users net rpc password Change a user password net rpc group List/modify groups net rpc share List/modify shares net rpc file List open files net rpc printer List/modify printers net rpc changetrustpw Change trust account password net rpc trustdom Modify domain trusts net rpc abortshutdown Abort a remote shutdown net rpc shutdown Shutdown a remote server net rpc samdump Dump SAM data of remote NT PDC net rpc vampire Sync a remote NT PDC’s data into local passdb net rpc getsid Fetch the domain sid into local secrets.tdb net rpc rights Manage privileges assigned to SID net rpc service Start/stop/query remote services net rpc registry Manage registry hives net rpc shell Open interactive shell on remote server net rpc trust Manage trusts net rpc conf Configure a remote samba server
Install depot_tools: [bash]$ git clone https://chromium.googlesource.com/chromium/tools/depot_tools.git –depth 1[/bash] Add depot_tools to your PATH: [bash]$ export PATH=`pwd`/depot_tools:"$PATH"[/bash]
Tweak sudoers config:
[bash] cd /tmp cat > ./sudo_editor <<EOF #!/bin/sh echo Defaults \!tty_tickets > \$1 # Entering your password in one shell affects all shells echo Defaults timestamp_timeout=180 >> \$1 # Time between re-requesting your password, in minutes EOF chmod +x ./sudo_editor sudo EDITOR=./sudo_editor visudo -f /etc/sudoers.d/relax_requirements [/bash]
Create directory for chromiumos: [bash]$ mkdir -p ${HOME}/chromiumos[/bash] Get the source code: [bash]$ cd ${HOME}/chromiumos $ repo init -u https://chromium.googlesource.com/chromiumos/manifest.git –repo-url https://chromium.googlesource.com/external/repo.git $ repo sync[/bash]
Create(and enter) a chroot(still in the directory for chromiumos): [bash]$ cros_sdk[/bash]
Choose a board you want to build for, from ~/trunk/src/overlays, and export it to environment: [bash]chroot$ export BOARD=amd64-generic[/bash] (I selected amd64 arch) Setup board: [bash]chroot$ ~/trunk/src/scripts/setup_board –board=${BOARD}[/bash] Setup password: [bash]chroot$ ~/trunk/src/scripts/set_shared_user_password.sh[/bash] (if you want to config kernel, you can try to configure it now, via ~/trunk/src/third_party/kernel/v3.4/chromeos/scripts/kernelconfig, place v3.4 with your kernel version here) Build packages: [bash]chroot$ ~/trunk/src/scripts/build_packages –board=${BOARD}[/bash] Build image(we are almost there): [bash]chroot$ ~/trunk/src/scripts/build_image –board=${BOARD} –noenable_rootfs_verification dev[/bash]
Copy image to a usb drive: [bash]chroot$ cros flash –board=${BOARD} usb://[/bash] or copy to file: [bash]chroot$ cros flash –board=${BOARD} file://./[/bash] or create a imgage for virtual machine (default for kvm, for other vm you can pass parameters –format=vmware or –format=virtualbox): [bash]chroot$ ~/trunk/src/scripts/image_to_vm.sh –board=${BOARD}[/bash] (image will be here : ~/trunk/src/build/images/${BOARD}/latest/)
If you copy image to a file, you can use dd to write to a usb disk like this: [bash]$ sudo dd if=./chromiumos_image.bin of=/dev/sde bs=4M[/bash]
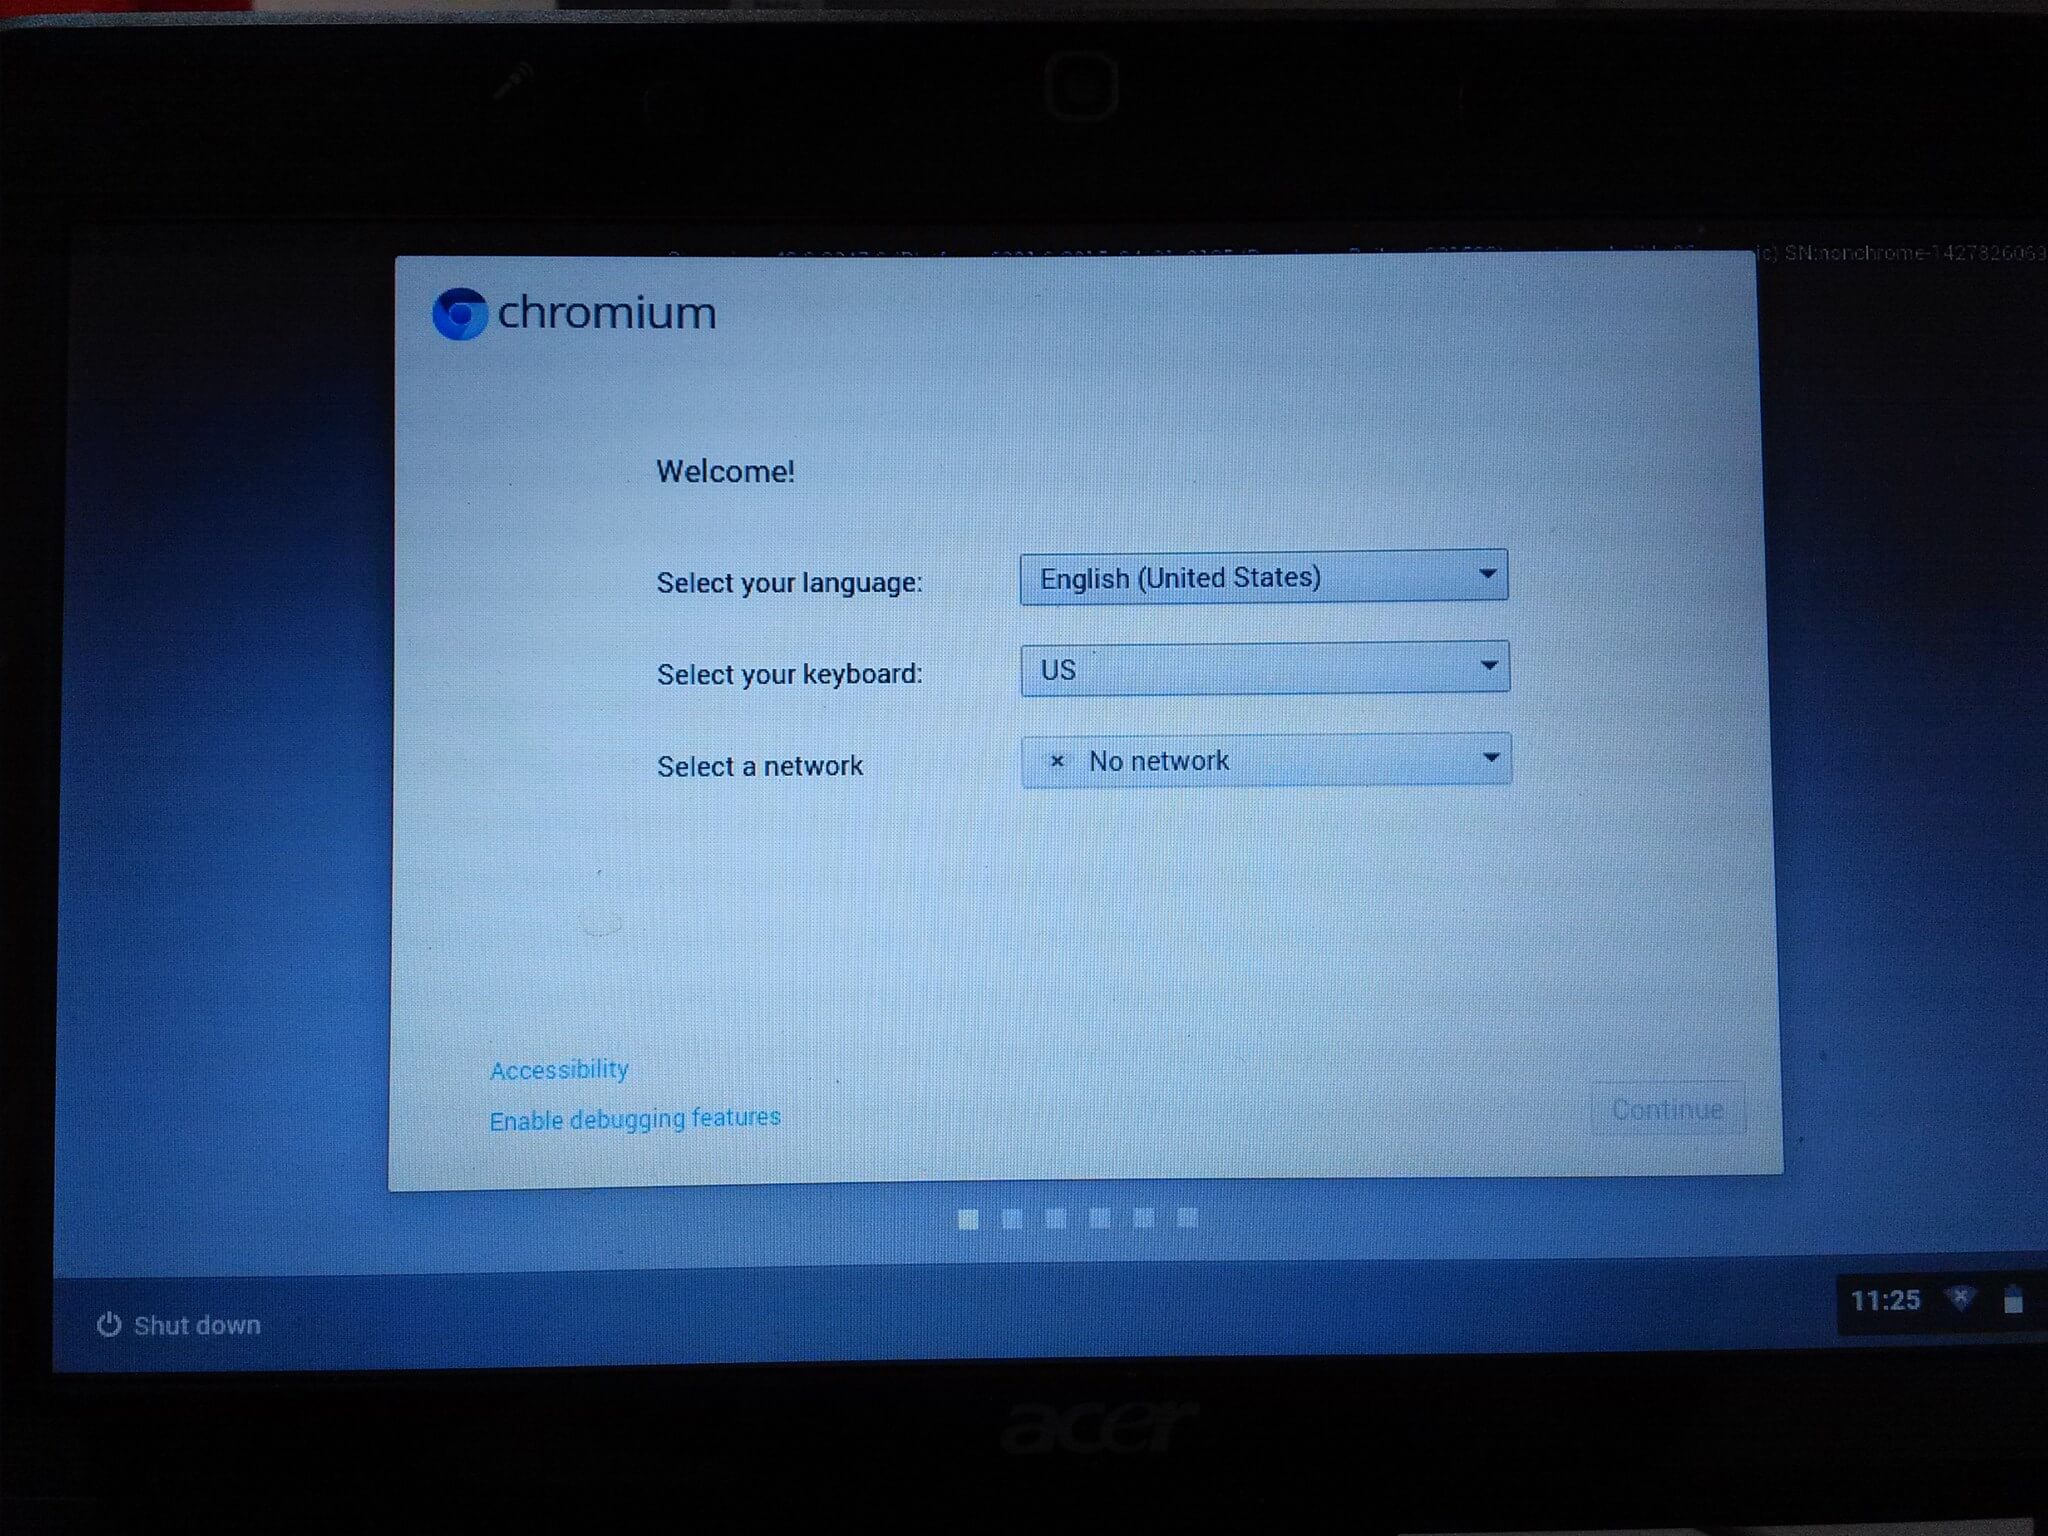
And then you can boot a computer via this usb disk now.
If you got kernel panic, you may need to press Esc and try this command to boot [bash]chromeos-usb.A boot=/dev/sdX3[/bash], X may be a~e
If you want to install Chromium OS to your hard disk, try this command when your usb disk boot up: [bash]$ sudo /usr/sbin/chromeos-install[/bash], PS, it’ll wipe your disk!!!
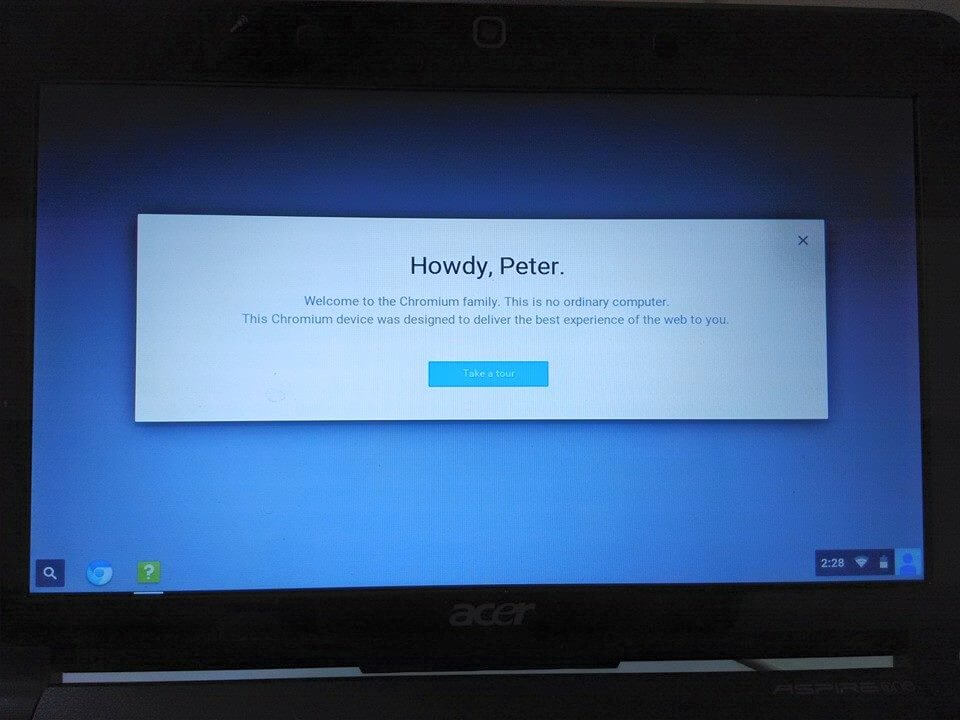
Don’t know what’s the reason why it’ll keep getting deadly segment fault and hang, but it works on my acer Aspire one D150, a super old notebook, the performance is not so good, and I don’t know how to remap the keyboard on it(there are 3 broken keys orz …), so I just quit, ha!
Only 2 screenshots this time … took by my low-end phone.